
JetEngine for Elementor: Custom Post Types, Taxonomies & Relations
Build a course directory with JetEngine and Elementor: choose custom post types, fields and taxonomies, connect instructors to courses, and show the right related records.
A course card shows its title, image, topic and duration. An instructor profile lists only that instructor’s courses. Change a course record once, and its dynamic cards read the updated information wherever they appear. That is the result we will build with JetEngine and Elementor.
This worked example is based on official documentation and builds a course directory; enrolment, quizzes and checkout would require their own implementation. Courses and Instructors have their own records, Design and Development organise the catalogue, and a saved relation connects each course to its instructor. You can apply the same approach to properties and agents, projects and clients, or events and speakers.
JetEngine supplies the content structure and dynamic widgets. Elementor supplies the layout. The part that needs care is the connection between the two: a well-designed card still shows the wrong courses if its query starts from the wrong object.
This guide follows one model from registration to front-end output, then shows how to reverse the relation and diagnose empty or incorrect listings.
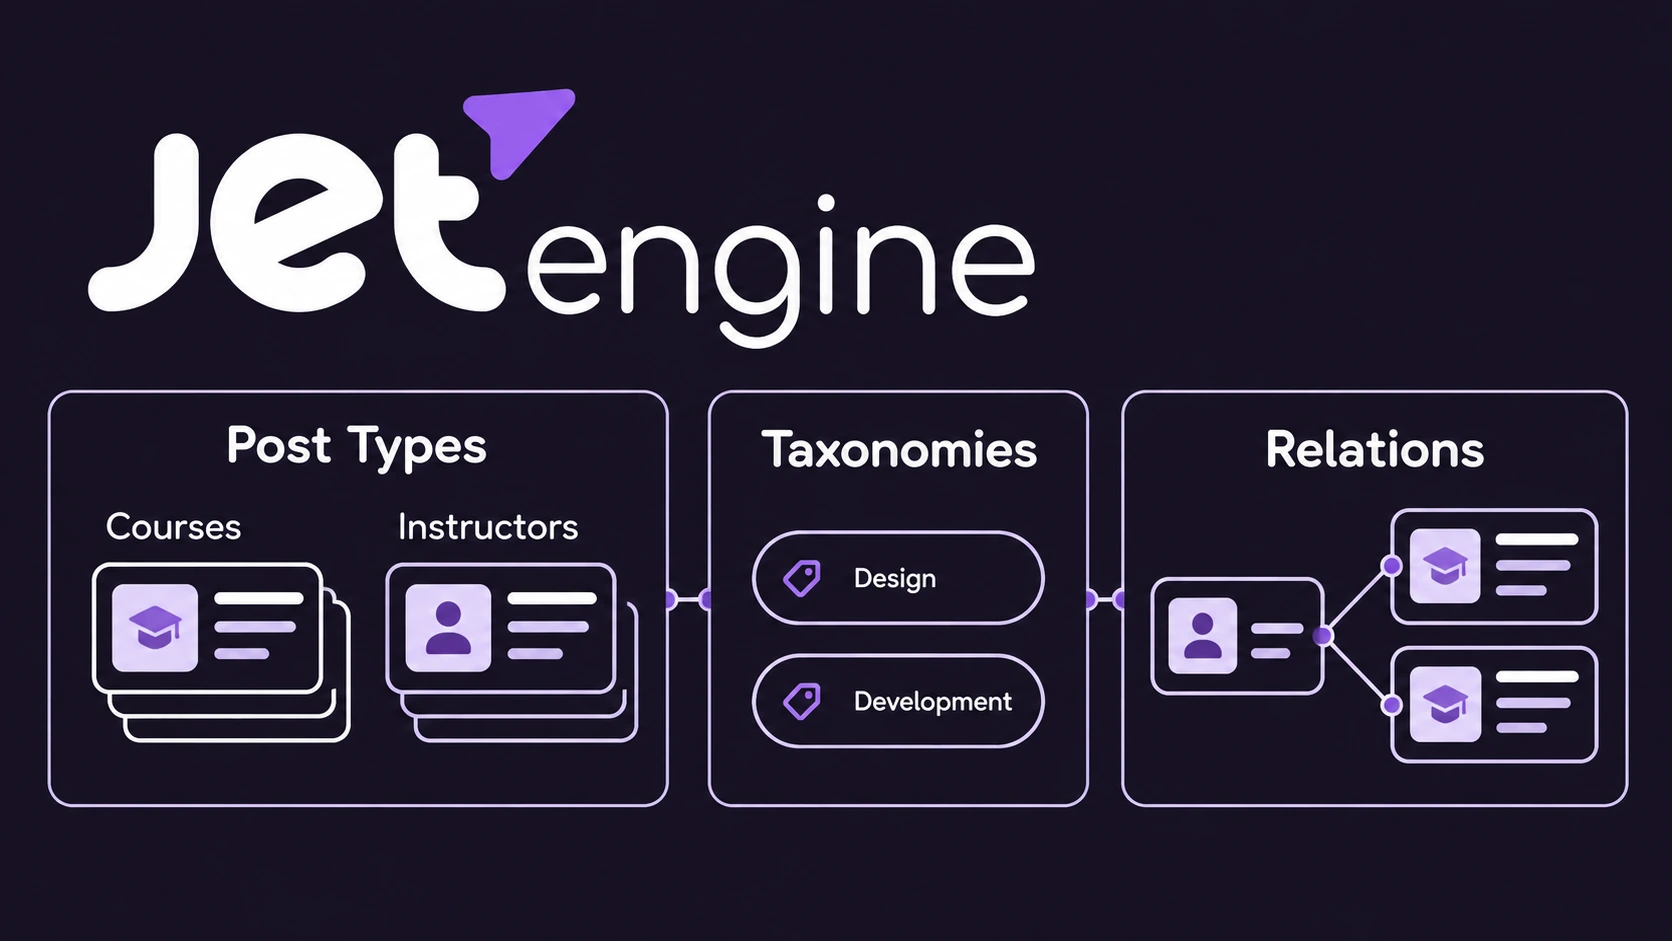
Decide what belongs in a post type, field, taxonomy or relation
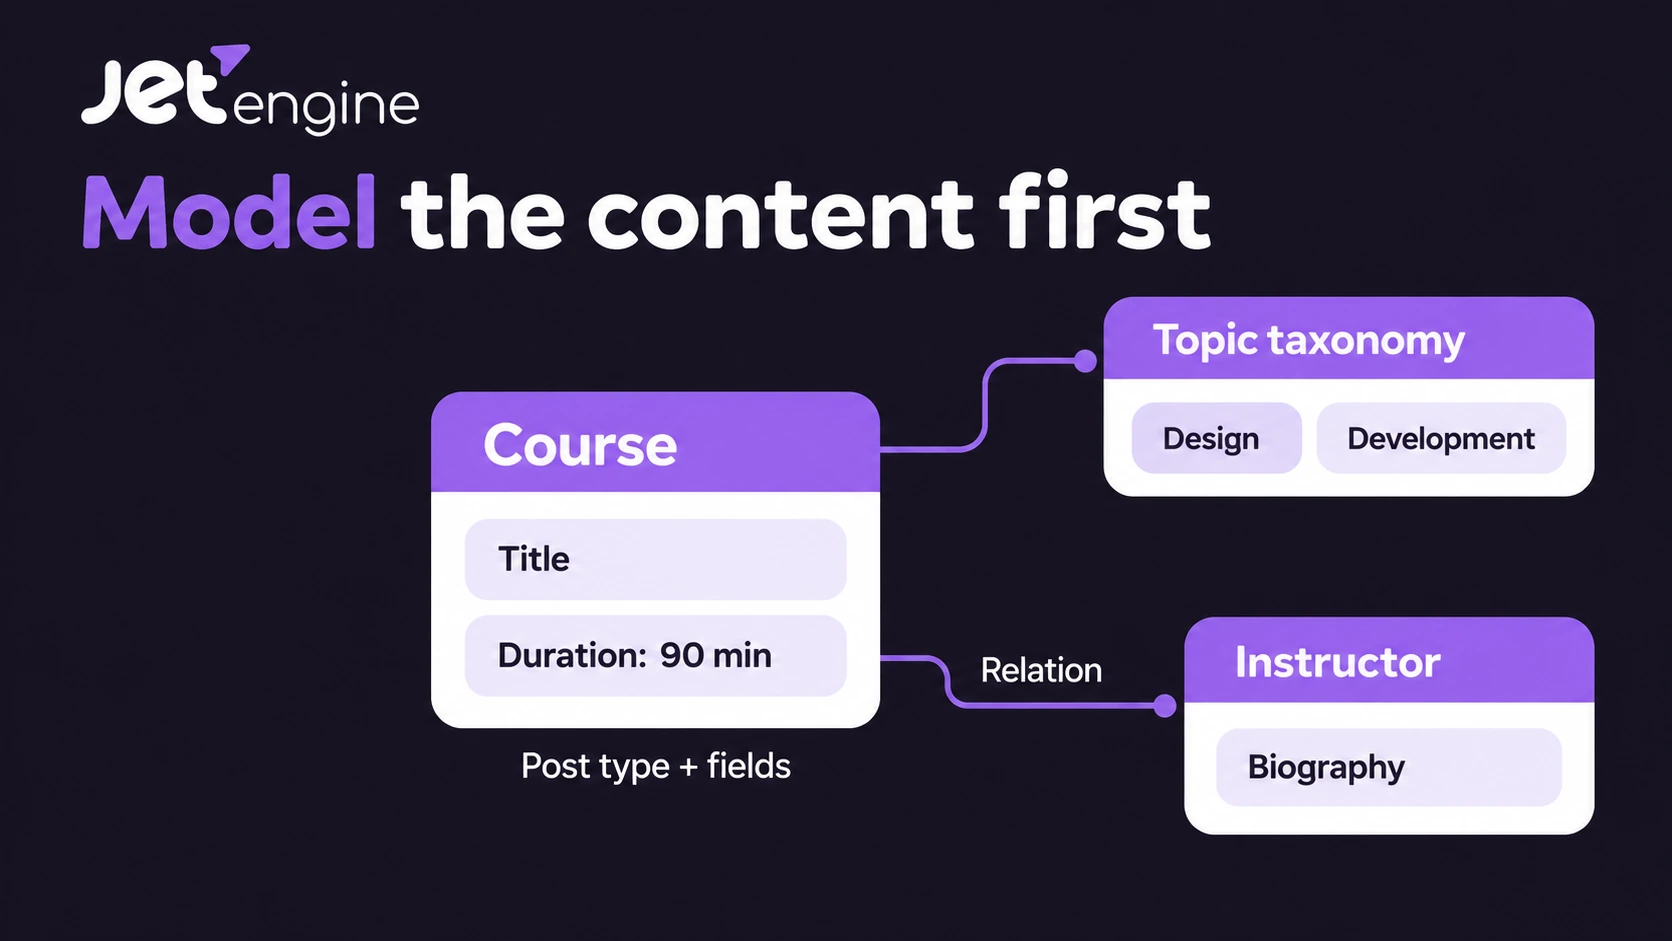
Before opening the builder, write the information you need to store. In this example, a course has a title, description, featured image, duration and topic. An instructor has a name, biography and portrait. The instructor exists independently and may teach several courses.
Use this decision table to put each piece in the right place:
| Information | Model | Why it fits |
|---|---|---|
| A course with its own detail page | Courses custom post type | It is an independently editable content record |
| An instructor profile | Instructors custom post type | One profile can be reused across several courses |
| Design or Development | Topic taxonomy | These are shared classifications for courses |
| Duration in minutes | Number meta field on Courses | It describes one course |
| Optional syllabus | WYSIWYG meta field on Courses | It stores formatted content for a separate syllabus section |
| Which instructor teaches a course | Instructor Courses relation | It connects two existing records |
WordPress distinguishes a taxonomy from its terms: Topic is the taxonomy; Design and Development are terms within it. Its taxonomy documentation explains this classification model.
An instructor’s name could be a text field, but that would make every course carry its own copy. A reusable profile gives you one place for the biography and portrait, with a relation defining where that profile belongs. Equally, a topic does not need a separate content record merely to label courses.
For this walkthrough, each course has one instructor, and each instructor may have many courses. That makes the relation one-to-many. If courses can be co-taught, choose many-to-many instead. Decide this from your editorial rules, before creating connections.
What you need for dynamic content in WordPress with Elementor
Install and activate JetEngine and Elementor. Crocoblock’s Elementor listing tutorial uses Elementor Free with JetEngine to build the reusable card and Listing Grid.
Custom single and archive templates are a separate dependency. Use Elementor Pro’s Theme Builder, or a compatible template system such as the separate JetThemeCore plugin. Crocoblock documents JetThemeCore single templates with Elementor Free and JetEngine. For the Elementor route, our Elementor Pro review explains the broader builder capabilities.
Keep these responsibilities clear. A listing designs one repeated card; a single template designs the detail page around it. Registering Courses does not automatically create either design.
Work on a staging site if this is an existing catalogue. Record the machine identifiers you choose, because fields, listings and queries will refer to them. Use different identifiers if the suggested ones already exist on your installation.
Create the JetEngine custom post types and course fields
Open JetEngine → Post Types → Add New. Create Courses, then repeat the process for Instructors. Crocoblock’s CPT creation guide covers this registration screen.
Use the following example identifiers:
| Post type | Machine key | Core content |
|---|---|---|
| Courses | wpperk_course | Title, description in the editor, featured image |
| Instructors | wpperk_instructor | Name as the title, biography in the editor, portrait as the featured image |
These keys are distinct from the readable labels shown to editors. WordPress limits post type identifiers to 20 characters; a project prefix helps avoid collisions. See the WordPress registration guidance.
In each CPT’s advanced settings, configure Supports for the title, editor and featured image features. For this public directory, enable Is Public, Publicly Queryable and Show Admin UI so the records can have public detail pages and an editing menu. Enable Has Archive for Courses if you want a native course archive. The CPT settings reference distinguishes these controls.
The thumbnail feature also depends on theme support for featured images, as documented in WordPress’s supported post features.
If you want to edit an individual course or instructor directly in Elementor, enable that post type in Elementor → Settings. This controls the “Edit with Elementor” option; it is separate from creating a reusable listing or applying a single template. See Crocoblock’s CPT editor setup.
Give course attributes stable field names
In the Courses CPT’s meta fields section, add a Duration field with the Number type. Use an identifier such as wpperk_duration_minutes, and explain in its description that editors enter minutes without a unit. Store 90, then add “min” in the display template.
If the directory needs a syllabus separate from the main description, add an optional WYSIWYG field named wpperk_syllabus. Otherwise, use the normal editor for the course description and skip the extra field.
JetEngine separates a field’s visible label from its stored Name/ID. Check that ID before saving instead of relying blindly on an automatically generated name. Its field types reference documents Number, WYSIWYG and the field settings.
Use minutes for every record in this example. A duration entered in a different unit would make the same card label misleading and comparisons unreliable. Write “Duration in minutes” into the editing instructions so another editor can follow the convention without guessing.
Attach a Topic taxonomy and add real records
Open JetEngine → Taxonomies → Add New. Name the taxonomy Topic, use a unique key such as wpperk_topic, and attach it to Courses. Save it, then add the Design and Development terms from the taxonomy menu under Courses.
Assign a term to each course and save the course. Creating a taxonomy registers the classification; it does not assign terms to existing records. Crocoblock’s taxonomy setup guide shows both operations.
Use a flat taxonomy for these two topics. If you later need Design → Interface Design and Design → Graphic Design, a hierarchical taxonomy can represent that structure. This term hierarchy is separate from an instructor-to-course relation.
Now create three instructor records and three course records. These are illustrative names and values for checking the setup:
| Course | Topic | Duration | Instructor to connect |
|---|---|---|---|
| Accessible Interface Design | Design | 90 minutes | Maya Chen |
| Design Systems Foundations | Design | 120 minutes | Maya Chen |
| WordPress Development Basics | Development | 180 minutes | Omar Ali |
Add Maya Chen, Omar Ali and Lena Ortiz as Instructors. Give the courses descriptions and featured images, enter their duration numbers, and publish the sample records you want visible in the directory. Leave Lena without courses for the empty-result check later.
A field definition without a saved value produces no useful duration output. A listing template without records has nothing meaningful to repeat. Populate this small dataset before styling the catalogue.
Set up JetEngine relations and connect the records
Open JetEngine → Relations → Add New. Create a relation called Instructor Courses with Instructors as the parent object, Courses as the child object, and one-to-many as its type.
Enable the editing controls for both objects so editors can manage connections from instructor and course screens. The Relations settings reference explains the available controls and relation types.
“Parent” and “child” describe the direction of this connection. They do not make course posts native WordPress children of instructor posts. Leave that distinction intact when you build the query.
Open Maya’s instructor record, find the related children area, select the two existing Design courses and save. Connect Omar to WordPress Development Basics. You can also manage the parent connection from a course record when its relation controls are enabled. Crocoblock documents editing actual related items separately from registering the relation.
Check one course afterward to confirm the intended instructor is connected. Matching names, taxonomy terms or WordPress post authors do not establish this relation. The saved connection between the two records does.
Keep the biography on the instructor and duration on the course. If you later allow co-teaching and need a different teaching role for each instructor-course pairing, that role belongs on the connection. JetEngine supports relation metadata and its dynamic output.
Build one course card, then repeat it with Listing Grid
In JetEngine → Listings/Components, add a listing with Posts as its source, Courses as its post type, and Elementor as its view. Name it Course Card. The listing template reference describes these source settings.
Add a Dynamic Image with Post thumbnail as its source. Add a Dynamic Field using Post/Term/User/Object Data and the Title object field, then a Dynamic Link using Permalink. These JetEngine widgets should read the active course record, rather than contain text copied from your first sample course.
Add another Dynamic Field for the duration: choose metadata as the source and select wpperk_duration_minutes. Enable Customize field output and enter %s min, where the placeholder represents the saved value. For optional values, choose whether the widget should disappear or show a useful fallback. The Dynamic Field reference explains formatting and empty-value controls.
Display Topic with JetEngine’s Dynamic Terms widget, selecting your Topic taxonomy. A topic badge and a duration label now come from different sources, even if they look similar in the card.
Keep the card concise: image, title, topic, duration and a clear detail link. Put the full description and optional syllabus on the course single page. Use a heading level that fits the surrounding page, and check long titles at mobile width.
Save the listing. On a normal Elementor page, add Listing Grid and select Course Card to inspect the basic catalogue. Confirm that different courses produce different titles, images and durations before applying a relation query. This separates data-binding errors from selection errors.
Show only the courses for the current instructor
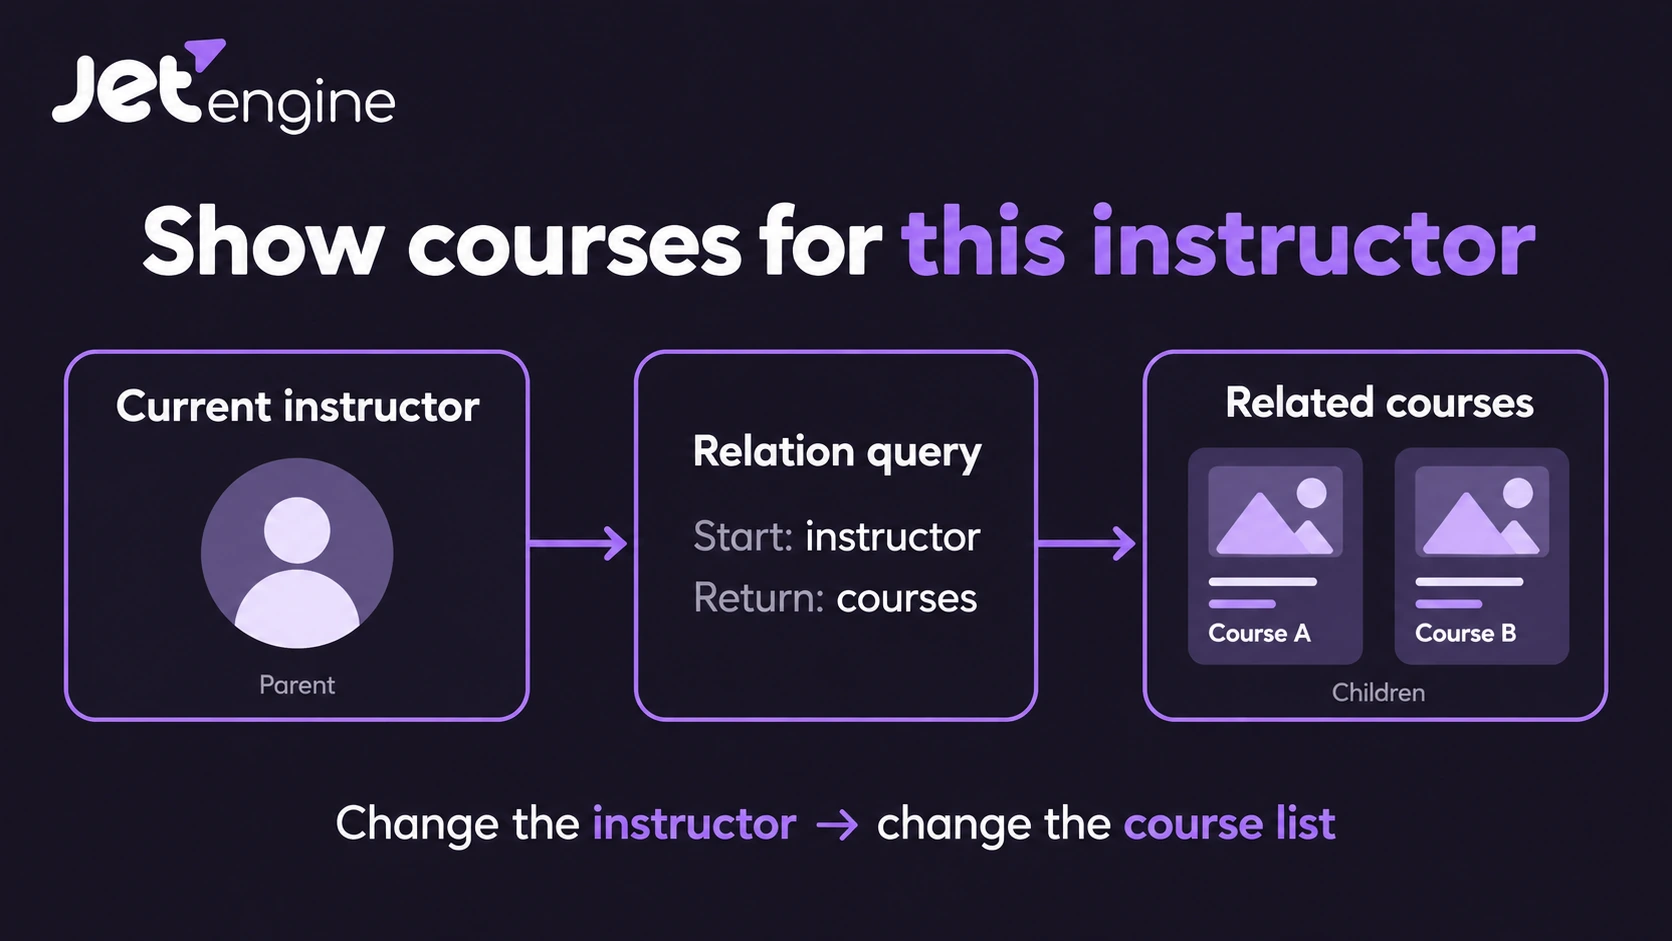
A course card controls appearance. A query controls membership. For a relation-only list, create a direct Relations Query in JetEngine → Query Builder → Add New and name it Courses for Current Instructor.
Set its query type to Relations Query, select Instructor Courses, request the children of a fixed parent, and use the current object as the starting object. The exact controls are:
| Control | Value |
|---|---|
| Relation | Instructor Courses |
| Items to Get | Get Children Items for Fixed Parent |
| Initial Object From | Current Object ID |
Save the query, then create the Instructor Single template through your chosen template system. With JetThemeCore, open Crocoblock → Theme Builder, create a page template and set its condition to Include → Singular → Instructors → All. Create an Elementor template for its body. With Elementor Pro, create a Single Post template and set its display conditions to Instructors.
Use dynamic widgets for the instructor’s title, featured portrait and biography from the post content. Beneath that profile, add Listing Grid, select Course Card, enable Use Custom Query in its Custom Query section, and select Courses for Current Instructor. Save the template and confirm its conditions apply to instructor records.
On an actual instructor URL, the query starts with that instructor’s ID and retrieves the connected course IDs. Crocoblock’s Relations Query reference documents the direction and starting-object options.
Open Maya’s, Omar’s and Lena’s public profiles. Maya should show two course cards, Omar one, and Lena none. Give the empty state a deliberate treatment so visitors understand that courses have not been listed yet.
Use a Posts Query when you need explicit post conditions
A direct Relations Query is convenient for membership. For an explicit published-only list, ordering, or additional taxonomy and metadata conditions, build a separate Posts Query instead.
Select Courses as the post type and Published as the post status. In Post & Page → Post In, use the Related Items macro. Choose Instructor Courses, request Child Object, and take the initial ID from Current Object ID. Save this query and select it as the Listing Grid’s custom query. Crocoblock’s post relation tutorial demonstrates this route.
For that macro, open its advanced settings and set a fallback to a post ID verified not to exist on your installation. An empty inclusion macro can otherwise leave a query returning every item, as explained in the Query Builder macro guide. Do not assume an example number is unused on your site.
Check Lena again, then connect a draft course and confirm that the published-only query excludes it. Treat these as acceptance checks to perform; editor previews alone do not establish the final public behaviour.
Reverse the direction on a course page
Create an Instructor Card listing from Instructors. On a Course Single template, use a second Relations Query that requests parents for a fixed child. The course is now the starting object.
| Page | Starting record | Retrieve | Listing |
|---|---|---|---|
| Instructor single | Current instructor | Connected child courses | Course Card |
| Course single | Current course | Connected parent instructors | Instructor Card |
With our one-to-many model, a course has one connected instructor. A many-to-many model can return several. Changing the display direction does not change that underlying rule.
Keep the current-object context deliberate
Inside an Instructor listing, the current object can be the instructor card being rendered. Inside a nested Course listing, it can become the course instead. Use Default WordPress Object (for current page) when you intentionally need the outer single page’s object regardless of the active listing item.
That global object must still be an instructor for a query requesting its courses. On an ordinary landing page, it is the landing page. The relations context guide explains the distinction. Avoid hardcoding Maya’s ID into a template intended for every instructor.
Diagnose the data before changing the design
When the listing looks wrong, trace the saved records and selection query first:
| Symptom | First check |
|---|---|
| Every instructor shows the same courses | Wrong starting object, fixed ID, or missing custom query |
| Lena shows the whole catalogue | Empty Related Items macro and missing fallback in the Posts Query |
| No cards appear | Actual saved connections, relation direction and selected listing |
| Cards repeat the same title | Static text or a widget reading the wrong context |
| Duration is blank | Saved course value and exact metadata key |
| The design appears on unrelated content | Single-template conditions and the actual preview record |
Do not use Post Parent ID to substitute for the JetEngine relation. That control concerns native WordPress parentage; the related post IDs belong in Post In for the macro route. See the Posts Query settings.
Disconnect one course from Maya and verify that it leaves her grid while remaining a course record. Update its duration and verify the new value wherever its card is displayed. Check the reverse course page, mobile layout and detail links too.
After these checks pass, add visitor filters only if the catalogue needs them. Crocoblock’s Listing Grid filtering workflow uses the separate JetSmartFilters plugin. For front-end submission, JetFormBuilder can map form fields to posts and use its Connect Relation Items action with JetEngine. That is a separate form setup; a backend relation alone does not create the editorial workflow.
Start with the three sample courses and confirm the model, connections and both query directions. Then expand the catalogue through the same editing fields. The next course should need a new record, its topic and an instructor connection; the reusable Elementor layout should already be ready to display it.